Whelping Box Setup: What You Actually Need
Breeding & Whelping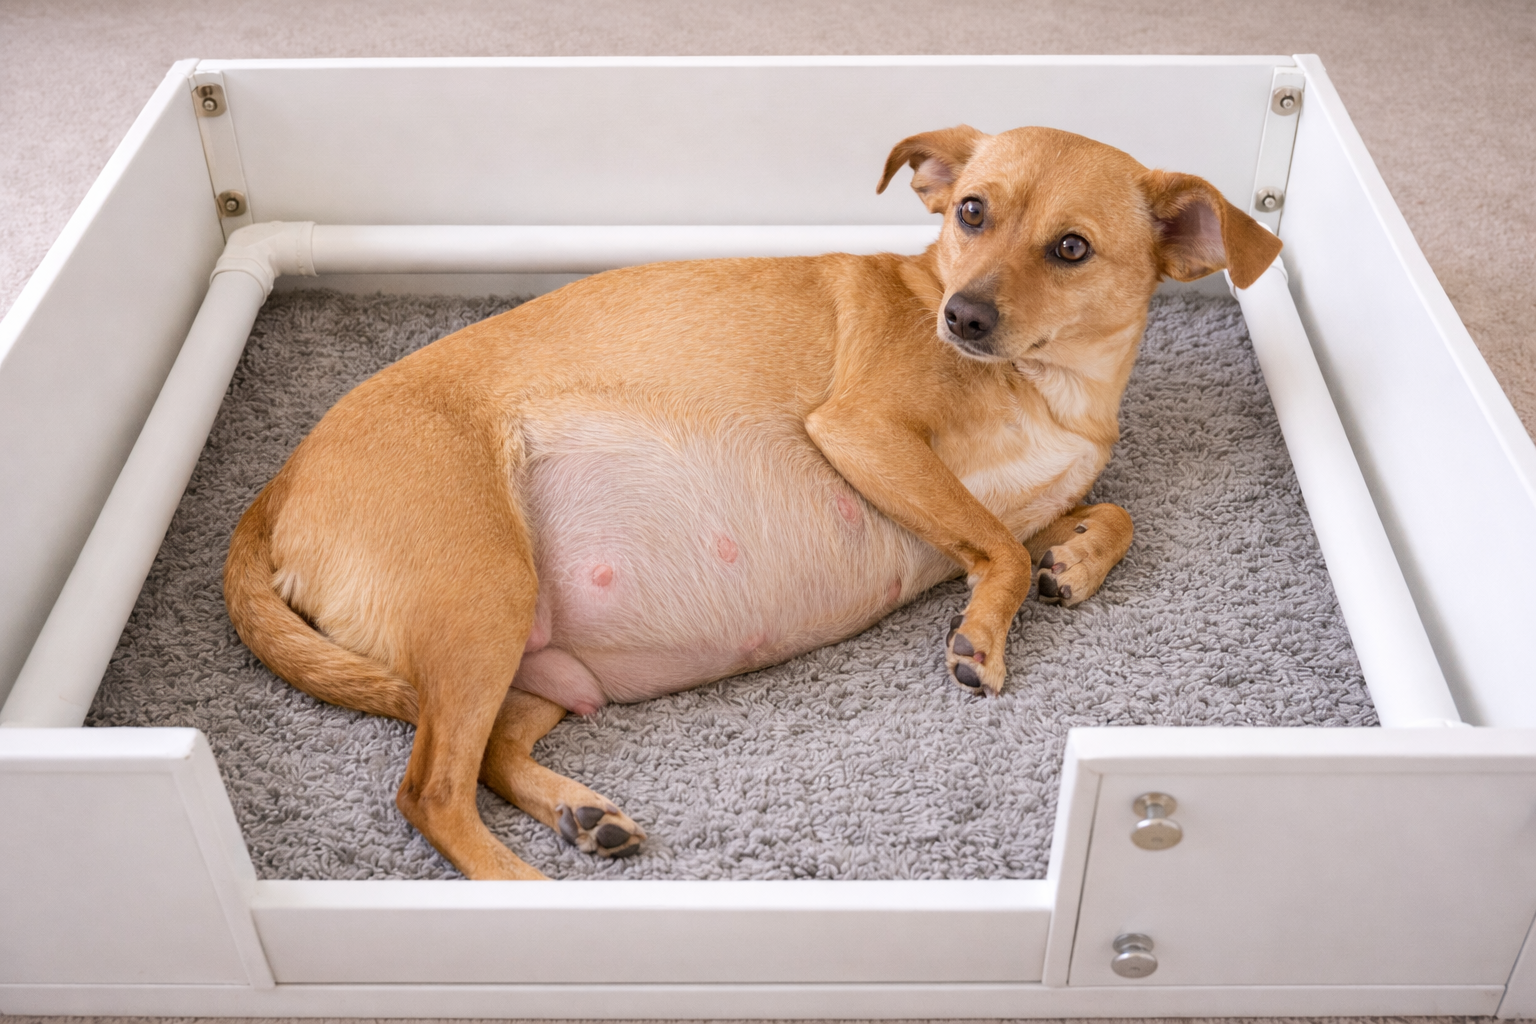 By James C. • February 24, 2026
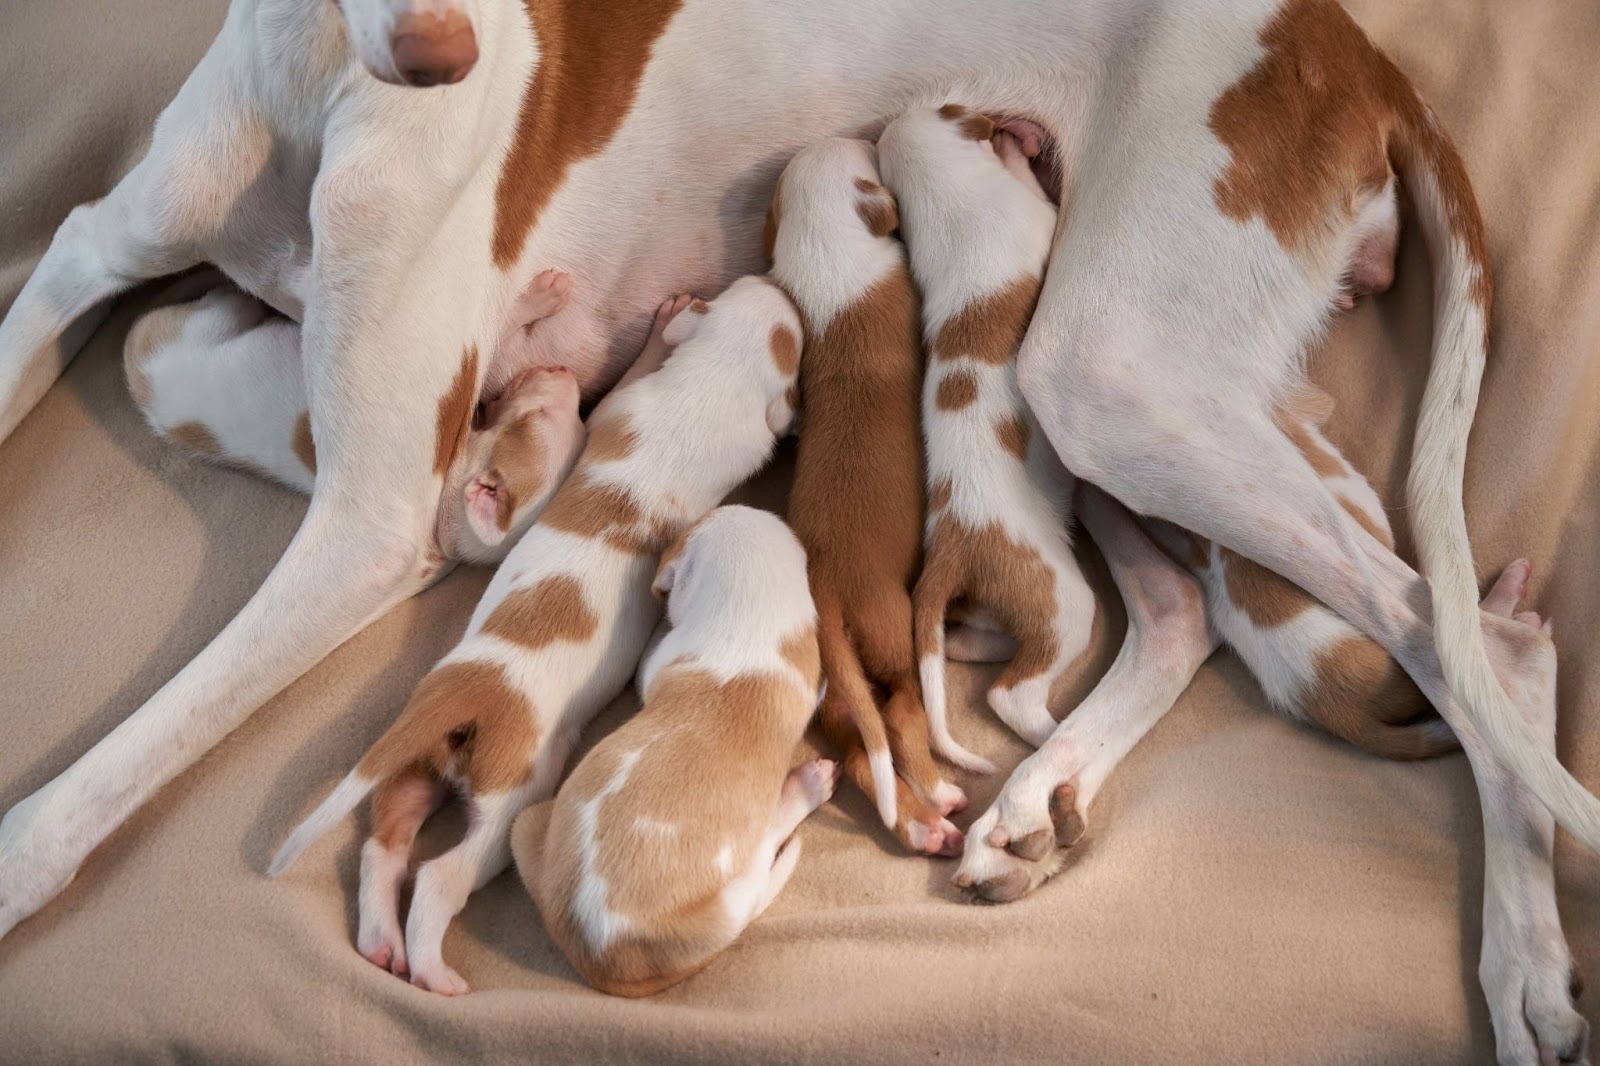
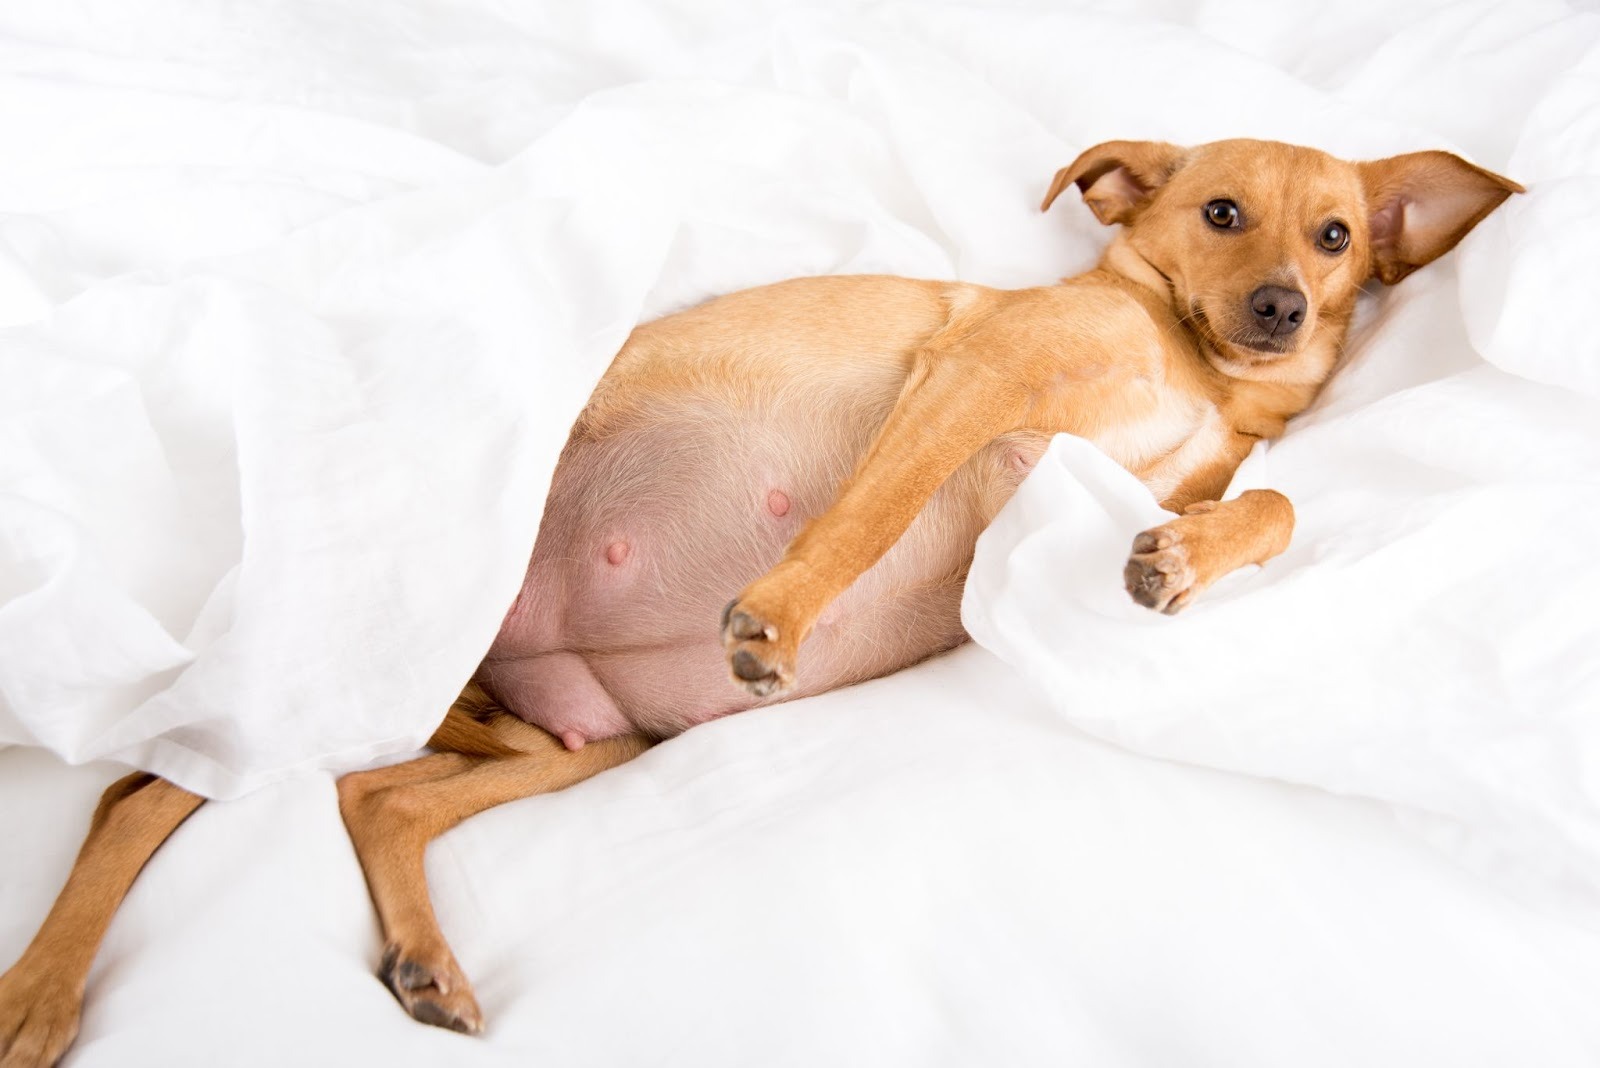
Preparing for a litter requires more than a cardboard box and old towels, and the whelping box is one of the first things to plan in responsible dog breeding.
A proper whelping box setup protects newborn puppies from crushing, chilling, and infection during their most vulnerable first days of life. The first 72 hours are especially critical, as puppies cannot regulate their body temperature or move away from danger.
In this guide, you will learn exactly what a safe whelping box needs, how to control temperature, which bedding works best, and how to create a calm, hygienic space for both mother and puppies.
Why a Proper Whelping Box Setup Matters
A carefully planned whelping box setup is not optional. It directly affects puppy survival, maternal comfort, and long-term development. The biggest early risks to newborn puppies are chilling, crushing, dehydration, and infection. Most of these risks are preventable with the correct environment.
Newborn puppies cannot regulate their body temperature for the first two to three weeks. If the space is too cold, they can become hypothermic within minutes. If it is too warm or humid, dehydration and respiratory stress may occur. Maintaining the correct temperature zone is one of the most important parts of your setup.
Crushing is another major cause of early puppy mortality. When a dam lies down, puppies can become trapped between her body and the box wall. This is why pig rails or puppy rails are strongly recommended in every properly built box.
Finally, hygiene plays a critical role. A poorly designed space with slippery bedding or absorbent materials that stay wet increases the risk of bacterial growth and infection during the neonatal period.
A well-designed whelping box protects against all of these risks while keeping the dam calm and secure.
The Critical First 72 Hours
The first 72 hours after birth are the most delicate stage of a puppy’s life. Puppies that are not nursing well, lying on their side instead of chest, crying persistently, or separating from the litter may require urgent veterinary advice.
A correct whelping box setup gives you visibility, warmth control, and safe boundaries to monitor and respond quickly.
Choosing the Right Whelping Box Size and Design
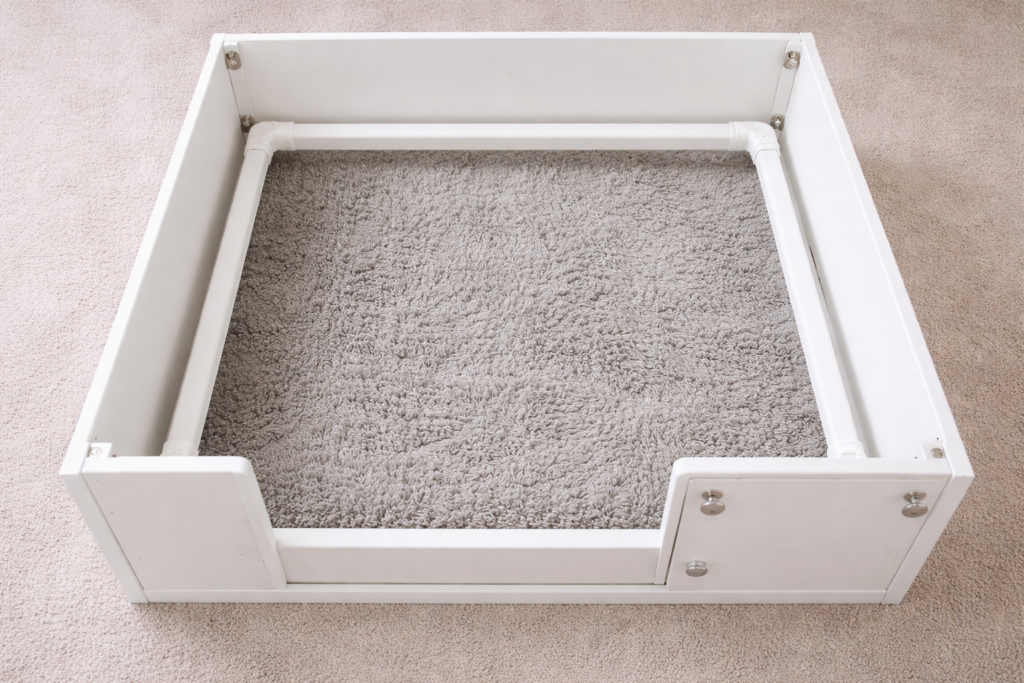
A proper whelping box setup begins with structure. Size, material, rail placement, flooring and long-term planning all influence puppy safety in the first few weeks of life.
The box must allow the dam to lie fully extended on her side without touching both ends. A good rule is to measure her nose to the rear when stretched out and add at least 20 to 30 cm. If the space is too tight, she may accidentally step on or lie on a puppy. If it is too large, newborn puppies can drift too far from warmth and struggle to nurse effectively.
Side height matters in two stages. For the first two to three weeks, 25 to 30 cm walls are usually sufficient and allow easy supervision. Once puppies begin crawling and attempting to climb, wall height should increase to 45 to 60 cm. Adjustable panels or removable door sections make this transition far easier than rebuilding the box mid-litter.
Materials should be non-porous and easy to disinfect. Sealed marine plywood, high-grade plastic panels, or modular plastic systems are commonly used. Raw timber absorbs fluids and bacteria, increasing infection risk. Surfaces should withstand daily cleaning without warping or degrading.
Pig rails, also called puppy rails or bumper rails, are not optional. Positioned approximately 7 to 12 cm from the floor and running around the inside perimeter, they create a safety buffer. If the dam lies against the wall, puppies can slip beneath the rail instead of being crushed. This is one of the most important safety features in any whelping box.
Flooring also deserves attention. If the box sits on concrete, tile or another cold surface, adding a raised wooden base or insulated layer underneath reduces chilling. Draft protection is essential, particularly in winter.
Finally, think beyond birth. Puppies typically remain in the box for around three to five weeks. Choosing a structure that allows later attachment of an exercise pen or weaning area will prevent overcrowding as they grow.
Are DIY Options Safe for a Whelping Box Setup?
DIY boxes can work if built correctly, but many improvised options lack rails, insulation or proper wall height. Kiddie pools are waterproof yet difficult to modify. Crates pose entrapment risks. Safety features must always take priority over convenience.
Temperature and Heat Control in a Whelping Box Setup
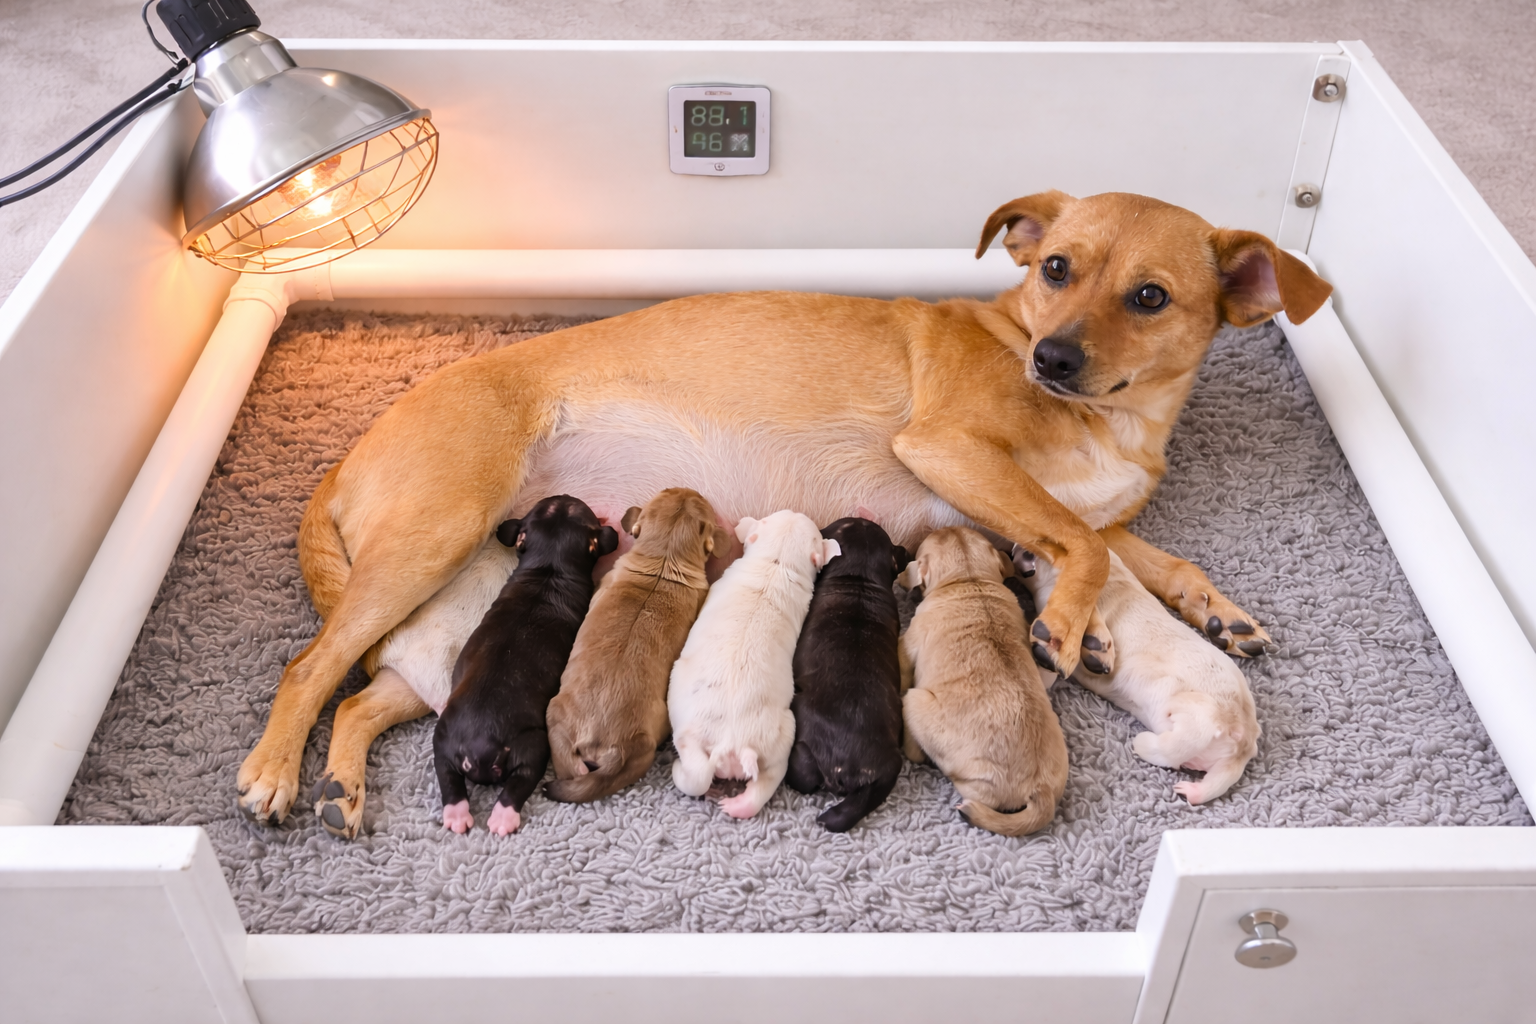
Temperature regulation is one of the most critical elements of a safe whelping box setup. Newborn puppies cannot regulate their own body heat and are highly vulnerable to hypothermia during the first two to three weeks of life.
The whelping area should initially be maintained between 29.5°C and 32°C during the first four days. This can gradually reduce to around 26–27°C by days 7 to 10, and then to approximately 22°C by the end of the fourth week. Maintaining the correct temperature significantly reduces early neonatal mortality.
A consistent heat source is essential. Suitable options include:
- Heat lamps positioned safely above one corner of the box
- Electric or water-filled heating pads
- Microwavable heat pads designed for pets
Heat should always be positioned to create warm and cool zones. Puppies must be able to move away if they become too warm. Never heat the entire room excessively, as overheating the dam can reduce milk production and cause discomfort.
Humidity also matters. Aim for approximately 65–70% humidity in the early days to prevent dehydration. Bowls of water or a humidifier can help stabilise the environment.
Always secure electrical cords out of reach. Attach a thermometer at puppy level inside the box to monitor conditions accurately.
Overheating can be just as dangerous as chilling. Excess heat may cause dehydration and respiratory stress in puppies. Careful monitoring ensures stability.
Signs Puppies Are Too Cold or Too Hot
Cold puppies often cry persistently, cluster tightly together, and feel cool to the touch. Overheated puppies may spread out, appear restless, or breathe rapidly. Monitoring behaviour alongside temperature readings ensures your whelping box setup remains safe and stable.
Best Bedding for a Safe Whelping Box Setup
Bedding plays a critical role in any whelping box setup. It must provide warmth, traction, moisture control and hygiene without creating suffocation or entanglement risks.
Newborn puppies cannot regulate their own body temperature for the first two to three weeks. Bedding must therefore help retain warmth while allowing easy cleaning. The base layer should be waterproof and non-slip. Many breeders use a sealed floor covered with a washable whelping pad or flannel-topped moisture-resistant liner.
Loose towels and small blankets are risky in early days. Puppies can crawl underneath folds and become trapped, increasing the risk of crushing or suffocation. Bedding that bunches up also reduces traction, making it harder for weak neonates to reach the dam’s nipples.
Artificial lambskin or fleece-style crate pads are often preferred because they provide grip, absorb fluids, and remain relatively stable under movement. These pads should be cut to fit the exact dimensions of the box. Having at least five to six liners allows frequent rotation and washing to maintain hygiene.
Newspaper may be used during active labour because it absorbs fluids and can be discarded easily. However, once puppies begin crawling, paper alone becomes slippery. If newspaper is used, layering torn strips loosely on top of flat sheets helps contain waste while reducing contact with moisture.
For breeders planning an extended indoor setup, indoor or outdoor carpet pieces can provide early traction if washed thoroughly beforehand. These must be securely fitted and regularly disinfected.
Cleanliness is non-negotiable. The whelping area should be disinfected regularly, and human traffic should be limited. Good hygiene reduces the risk of neonatal infections, which are a major threat during the first 72 hours of life.
How Often Should Bedding Be Changed?
During active labour, bedding may need replacing multiple times. In the first week, change soiled liners immediately and refresh fully at least once daily. Clean, dry bedding supports temperature stability and infection prevention.
Essential Supplies Checklist: What to Have Ready Before Labour
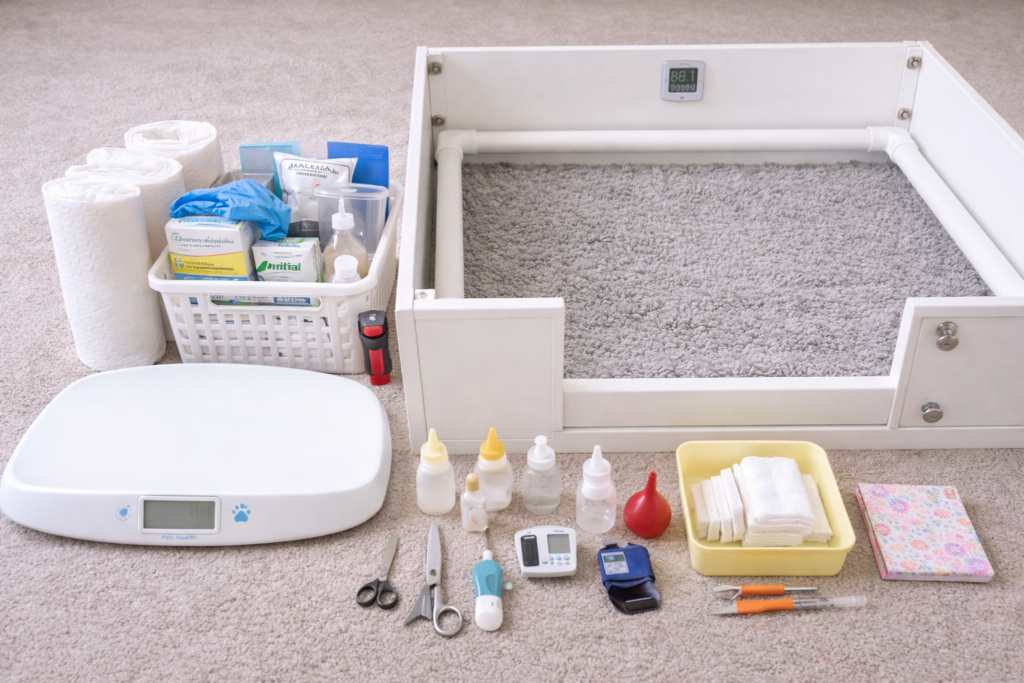
A well-prepared whelping box setup is more than just the box itself. Having the right supplies within reach can make the difference between calm support and stressful scrambling during labour.
Before your dog goes into labour, and especially once you notice signs your dog is ready to give birth, gather all essential items and keep them in one dedicated container near the whelping area. Labour can begin unexpectedly, and once it does, you may not have time to search for equipment.
Core Equipment for Whelping Support
You will need:
- Sterilised scissors and thread: In case you need to cut and tie an umbilical cord safely.
- Clean towels: For drying puppies and stimulating breathing.
- Digital thermometer: To monitor room and box temperature.
- Digital scales: To weigh puppies at birth, 12 hours, and 24 hours.
- Notepad or tracking sheet: To record birth times, placentas, and weight gain.
- Heat source: Such as a heat lamp or heating pad with thermostat control.
- Puppy formula and feeding syringe: For weak puppies who struggle to nurse.
Keep emergency veterinary contact details easily accessible, including out-of-hours numbers. It is also advisable to inform your vet a few days before the expected due date so they are aware you may need assistance.
Monitoring Supplies for the First 72 Hours
The first three days are critical. Watch for:
- Poor nursing
- Persistent crying
- Weak movement
- Lying on the side rather than chest
If you notice these signs, seek veterinary advice immediately.
A thorough whelping box setup includes both physical structure and preparedness. Being organised reduces stress for you and the dam, allowing you to focus on safe delivery and early neonatal care.
Hygiene and Cleanliness: Protecting Puppies From Infection
A clean environment is fundamental in any whelping box setup. Newborn puppies have immature immune systems, making them highly susceptible to infection during the first 72 hours of life, which is why spotting early signs of illness in puppies matters. Proper hygiene significantly reduces the risk of bacterial exposure.
The whelping area should be located in a quiet, low-traffic room. Limit visitors, especially during the first two weeks. Anyone entering the space should wash their hands thoroughly. If possible, remove outdoor shoes before entering to prevent contamination.
The bedding must be changed frequently. During active labour, absorbent materials such as newspaper, puppy pads, or disposable liners can help manage fluids. Once labour is complete, replace soiled materials promptly to prevent moisture build-up, which can lead to chilling or bacterial growth.
Disinfect the surrounding floor regularly using pet-safe cleaning products. Avoid harsh chemicals with strong fumes, as these can irritate both the dam and puppies. Waterproof bases beneath bedding help prevent moisture seeping into the flooring.
The dam herself should also be kept clean. Gently brushing her coat before whelping can reduce parasites and debris entering the box. Monitor vaginal discharge after birth; heavy, foul-smelling discharge may require veterinary attention.
Maintaining strict hygiene within your whelping box setup is not optional. It is one of the most effective ways to protect vulnerable neonates during their most delicate stage of life.
After Birth: Monitoring Mum and Puppies in the First 72 Hours

Your whelping box setup does not stop working once the last puppy is delivered. The first 72 hours are the most critical window for survival and often shape puppy mortality in the first two weeks. During this period, puppies are vulnerable to hypoxia, chilling, dehydration, and poor nursing.
Close observation is essential, but unnecessary interference can increase stress. Your role is to monitor quietly and intervene only when needed.
Immediate Post-Birth Priorities
As soon as each puppy is born, confirm:
- The amniotic sac is removed.
- Airways are clear.
- The puppy is breathing strongly.
- The puppy begins nursing within the first hour.
Early nursing is vital because puppies ingest colostrum, which provides antibodies that support immune protection during the first weeks of life. Colostrum absorption is most effective within the first 12 to 16 hours after birth.
If a puppy is weak or slow to latch, gently guide it to a teat and ensure it maintains suction.
Temperature Stability and Safe Positioning
Newborn puppies cannot regulate body temperature. Even short periods of chilling can be fatal. The box should remain at approximately 29 to 32°C in the first few days, with a warm zone and a slightly cooler zone to allow self-regulation.
Check that puppies are:
- Sleeping quietly in a relaxed cluster.
- Not scattered away from the dam.
- Not piling excessively under the heat source.
Excessive crying or restlessness may indicate cold stress or hunger.
Weight Monitoring and Growth Tracking
Weigh each puppy at birth, at 12 hours, at 24 hours, and daily thereafter. Record every measurement clearly.
Healthy puppies should:
- Gain weight daily.
- Nearly double their birth weight within the first week.
- Show steady strength when nursing.
Failure to gain weight is often the earliest sign of trouble. Early intervention improves survival outcomes.
Watching for Warning Signs
Contact your vet immediately if you observe:
- Persistent crying despite nursing.
- Weakness or lethargy.
- Lying on the side with mouth open.
- Separation from the dam.
- Lack of milk production from the mother.
- Green discharge before all puppies are born.
Prolonged straining without delivery, or more than two hours between puppies when more are expected, can signal common whelping complications and requires veterinary guidance.
A calm, well-organised whelping box setup allows you to focus on observation rather than scrambling for equipment. Early detection, warmth, and proper nursing support are the foundations of healthy puppy development.
Common Whelping Box Setup Mistakes to Avoid
Even experienced breeders can overlook important details when preparing a whelping box setup, but these are especially common mistakes made by first-time breeders. Small errors in layout, heat control, or hygiene can increase the risk of crushing, chilling, dehydration, or infection during the most vulnerable neonatal period.
Avoiding the following mistakes will significantly improve safety and outcomes for both dam and litter.
1. Choosing a Box That Is Too Large or Too Small
A box that is too large allows puppies to crawl away from mum and become chilled. A box that is too small increases the risk of the dam accidentally lying on a puppy.
The ideal size should be one and a half to two times the length of the dam, allowing her to stretch fully while keeping puppies within nursing distance.
2. Skipping Pig Rails or Installing Them Incorrectly
One of the most common accidental causes of neonatal death is crushing. Pig rails positioned 3–5 inches from the floor, slightly below the dam’s spine height when lying down, create a safety space for puppies to move into.
Incorrect placement or skipping rails entirely removes this protective buffer.
3. Poor Temperature Control
Newborn puppies cannot regulate their body temperature until around 2½ weeks of age. Relying solely on room heating is often ineffective.
The whelping area should maintain:
- 29–32°C during the first few days
- Gradual reduction to 26–27°C by day 7–10
- Around 22°C by week four
Overheating is equally dangerous. Excessive heat and humidity can lead to dehydration and respiratory stress in puppies, and may reduce the dam’s milk production.
4. Using Unsafe Bedding
Loose blankets, small towels, hay, straw, or wood shavings inside the whelping box can cause suffocation, eye irritation, or entrapment.
Bedding should be:
- Absorbent
- Non-slip
- Easy to disinfect
- Securely fitted to the box dimensions
Artificial lambskin pads, vetbeds, or fitted flannel-top whelping pads are safer alternatives.
5. Placing the Box in a Busy or Draughty Area
A whelping box placed in a high-traffic living space may cause stress and defensive behaviour in the dam. Drafts from doors or windows increase chilling risk.
The ideal location is:
- Quiet
- Draft-free
- Warm
- Easy for you to monitor
6. Failing to Introduce the Dam Early
Introducing the dam to the box only when labour begins can create anxiety. She may choose an unsuitable location instead.
The whelping box setup should be ready at least 5–7 days before her due date, allowing her to settle and nest comfortably.
7. Not Planning for Expansion
Many breeders prepare only for birth but forget that puppies grow rapidly. By 3–4 weeks, space must expand into a weaning pen or exercise area.
Without a clear plan, hygiene declines quickly, leading to stress and poor developmental outcomes.
A properly planned whelping box setup reduces preventable complications and supports healthy neonatal development during the critical first weeks of life. Attention to detail makes the difference between a stressful experience and a well-managed litter.
Final Thoughts on Building the Right Whelping Box Setup
A well-planned whelping box setup protects puppies during their most vulnerable stage and supports the dam through labour and recovery.
Correct sizing, safe rails, proper bedding, and controlled temperature are not optional extras. They are essential safeguards.
Preparation should begin well before the due date. When you build the right setup from the start, you reduce avoidable risks and give your litter the strongest possible beginning.
FAQs
1. What is the ideal temperature for a whelping box setup?
The ideal temperature for a whelping box setup during the first few days is between 29°C and 32°C. After the first week, this can gradually reduce to around 26–27°C, and then to 22–24°C by four weeks. Always monitor with a thermometer to prevent overheating or chilling.
2. How big should a whelping box be?
A whelping box should be at least 30 cm longer than the dam’s body length when stretched out. It must allow her to lie fully extended and turn comfortably, while still keeping puppies close enough to nurse and stay warm.
3. Are pig rails necessary in a whelping box setup?
Yes. Pig rails are one of the most important safety features. Positioned around 8–12 cm from the floor, they prevent puppies from being crushed against the walls if the dam lies down suddenly. They significantly reduce accidental suffocation risk.
4. What bedding is safest for newborn puppies?
Safe bedding should be absorbent, non-slip, and difficult for puppies to crawl underneath. Vetbed, fleece whelping pads, or fitted washable liners are ideal. Avoid loose blankets, hay, straw, or shredded materials that can cause smothering or irritation.
5. Can I use a heat lamp in my whelping box setup?
Yes, but it must be positioned safely. A heat lamp should create a warm zone while allowing a cooler escape area. It must be securely mounted and out of reach to prevent burns. Heating pads designed for pets are also suitable if used correctly.
6. When should I introduce my dog to the whelping box?
Introduce your dog to the whelping box at least one week before her due date. This allows her to become comfortable and reduces stress during labour. Early familiarity supports calmer behaviour and safer delivery.
7. How long do puppies stay in the whelping box?
Most puppies remain primarily in the whelping box for the first three to four weeks. As they become mobile, the space should expand into a weaning pen area. By five weeks, many litters require a larger enclosure for exercise and toilet separation.
 Add us as a preferred source